Light Follower Robot 🤖
Light Follower Robot 🤖 - Kit - Disassembled is backordered and will ship as soon as it is back in stock.
Delivery and Shipping
Delivery and Shipping
Domestic shipping is handled by Akis Express in one working day for pickup points and 2-3 working days for door to door delivery. For international shipping there is option for a Post Office or a FedEx Express.
Light Follower Robot 🤖

Light Follower Robot 🤖 - Kit - Disassembled is backordered and will ship as soon as it is back in stock.
*** Finally, the preorder period has ended! All Light Followers ship immediately 🥳 ***
Building a light follower robot is a classic project when getting started into the world of electronics and robotics. Although this project is usually being build around cheap materials as a one-off project, we wanted to create a platform that is well designed, offering a pleasant experience while building the project, giving the capability of future tinkering, hacking and experimentation...
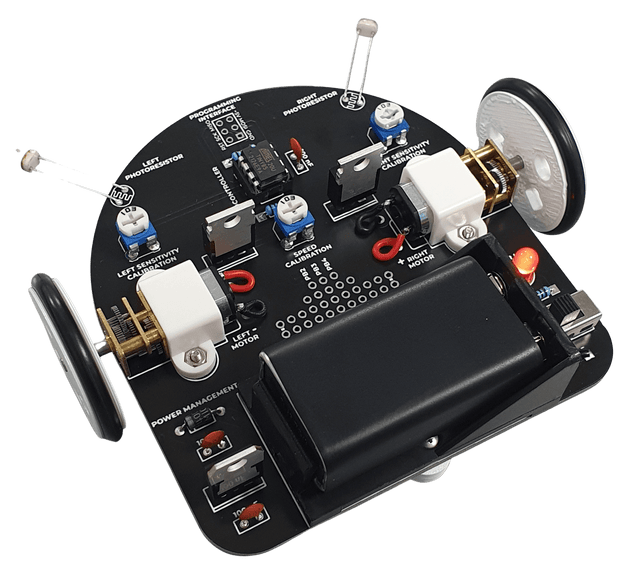
Meet the ROBO light follower robot 🤖

The light follower robot is built around the Attiny85 microcontroller, which is the most supported and widely known Arduino IDE compatible Attiny MCU 🙂. The MCU comes pre-programmed to do the light following in order to ease you building your first robot from scratch! You can always download the code from our GitHub page. If you are not familiar working with the Attiny using the Arduino IDE you can check our relevant blog post 😊.

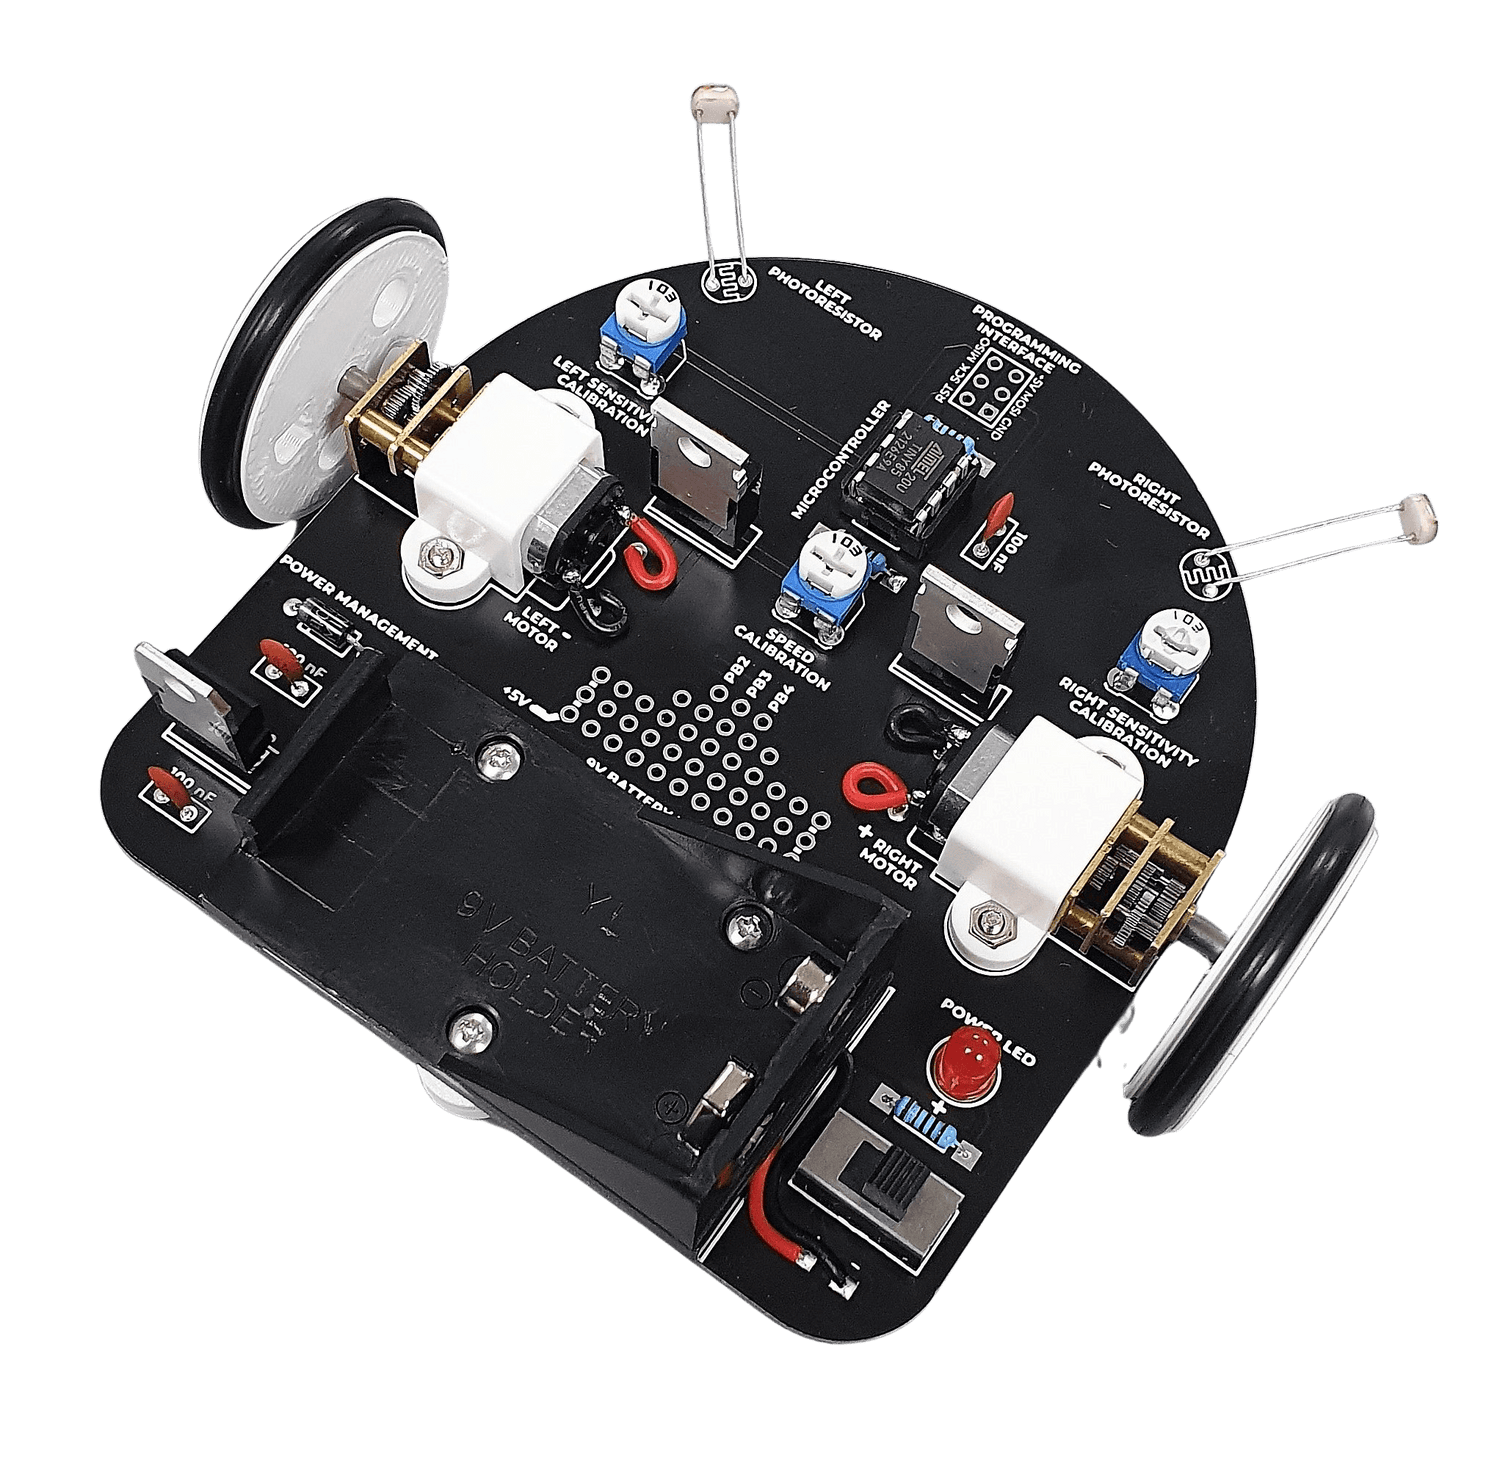
Since the ROBO Light Follower robot is built around the Attiny85 MCU, the circuit runs on 5V. An LM7805 IC voltage regulator is used to step down the battery voltage from ~9V to 5V. The robot has two MOSFETs (metal-oxide-semiconductor-field-effect-transistors) for controlling the two micro metal gearmotors. Two light sensors (photoresistors in series with a small potentiometer) are responsible for giving feedback to the microcontroller on which side has the most light at any moment. As always we love to give you the option to customize your robot, thus you can select the light sensitivity of each side by using the sensitivity calibration potentiometer, plus the overall robot speed using the speed calibration potentiometer. Even better, we designed a mini perfboard for you to hack and extend your Light Follower robot and reprogram it from the programming interface on top using an ISP programmer 🚀. The mini perfboard provides power (+5V), GND, and three data pins (be careful of the current usage of those pins, you might want to disconnect the photoresistors or the speed calibration pot), so happy hacking 😊.
The PCB is carefully designed, marked with all basic components, their functionality and circuit blocks so that you can easily understand what's going on and how the robot is set up.


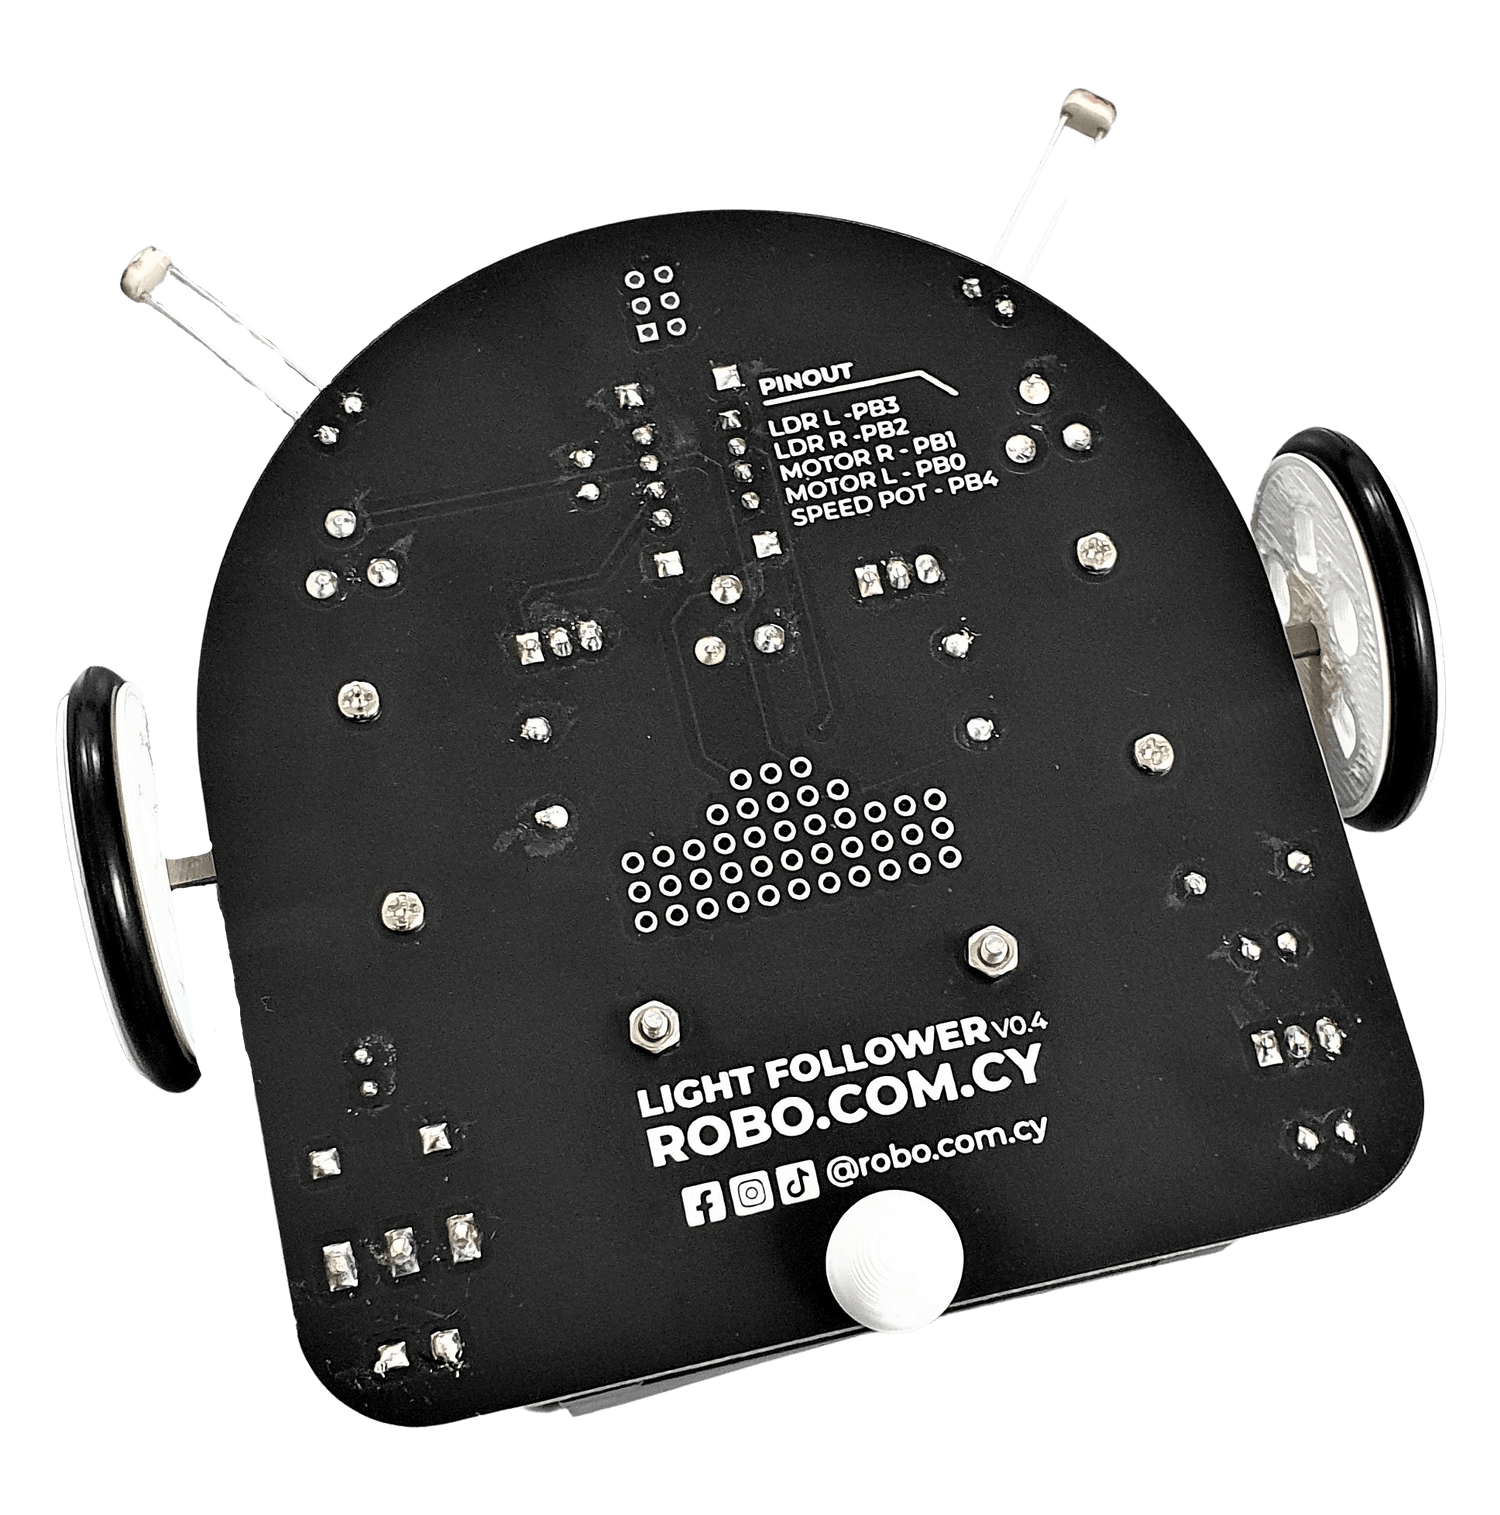
The back side of the PCB features the pinout table of the Attiny85 connections to the robot. LDR stands for "Light Dependent Resistor" which is basically the connection to the right or left light sensor.
What do you get:
A set of carefully selected parts to build your light follower robot and an Attiny85 MCU that comes pre-programmed to do the job.

In an essence, this is not just a light follower robot, but a mini cute robotic platform that can be customized to do lots of cool stuff ✨.
Assembly instructions:
The light follower robot was designed to be quite simple and straightforward to build. The only tools that you will need from your side, are a soldering iron and a Philips screwdriver for some M2 screws that hold the motors and the battery in place. You can use the following picture as an assembly reference. If you don't know how to solder you can head to our super cool soldering guide!

All ceramic capacitors and resistors have the same value, by design, so there is no issue in mixing and matching them 😊. You will need to watch for the polarity of the MOSFETs, LED, diode, and the Attiny85 MCU which is always marked on the board.
Get it up and running:
Connect a 9V battery (be careful with the battery holder, sometimes it's a bit hard to fit and remove the battery from there), turn on the switch, and get a flashlight! That's it, your robot should start crawling and following your flashlight 🔦. If not, the calibration potentiometers might need a bit of adjusting in order to match your room's light intensity. Nevertheless, you can adjust them to match the exact behavior you like 😀
Payment & Security
Payment methods
Your payment information is processed securely. We do not store credit card details nor have access to your credit card information.